Learn how to create a rotation.
- All Slack workspace users.
How to create a rotation?
- Go to Rotation App’s Home tab: Learn where to find Rotation App’s Home tab.
- Open the rotation creation dialog: Press the ➕ Create Rotation button to open the rotation creation dialog.
- Configure your rotation:
In the rotation creation dialog, you’ll be able to customize the configuration of your rotation as needed: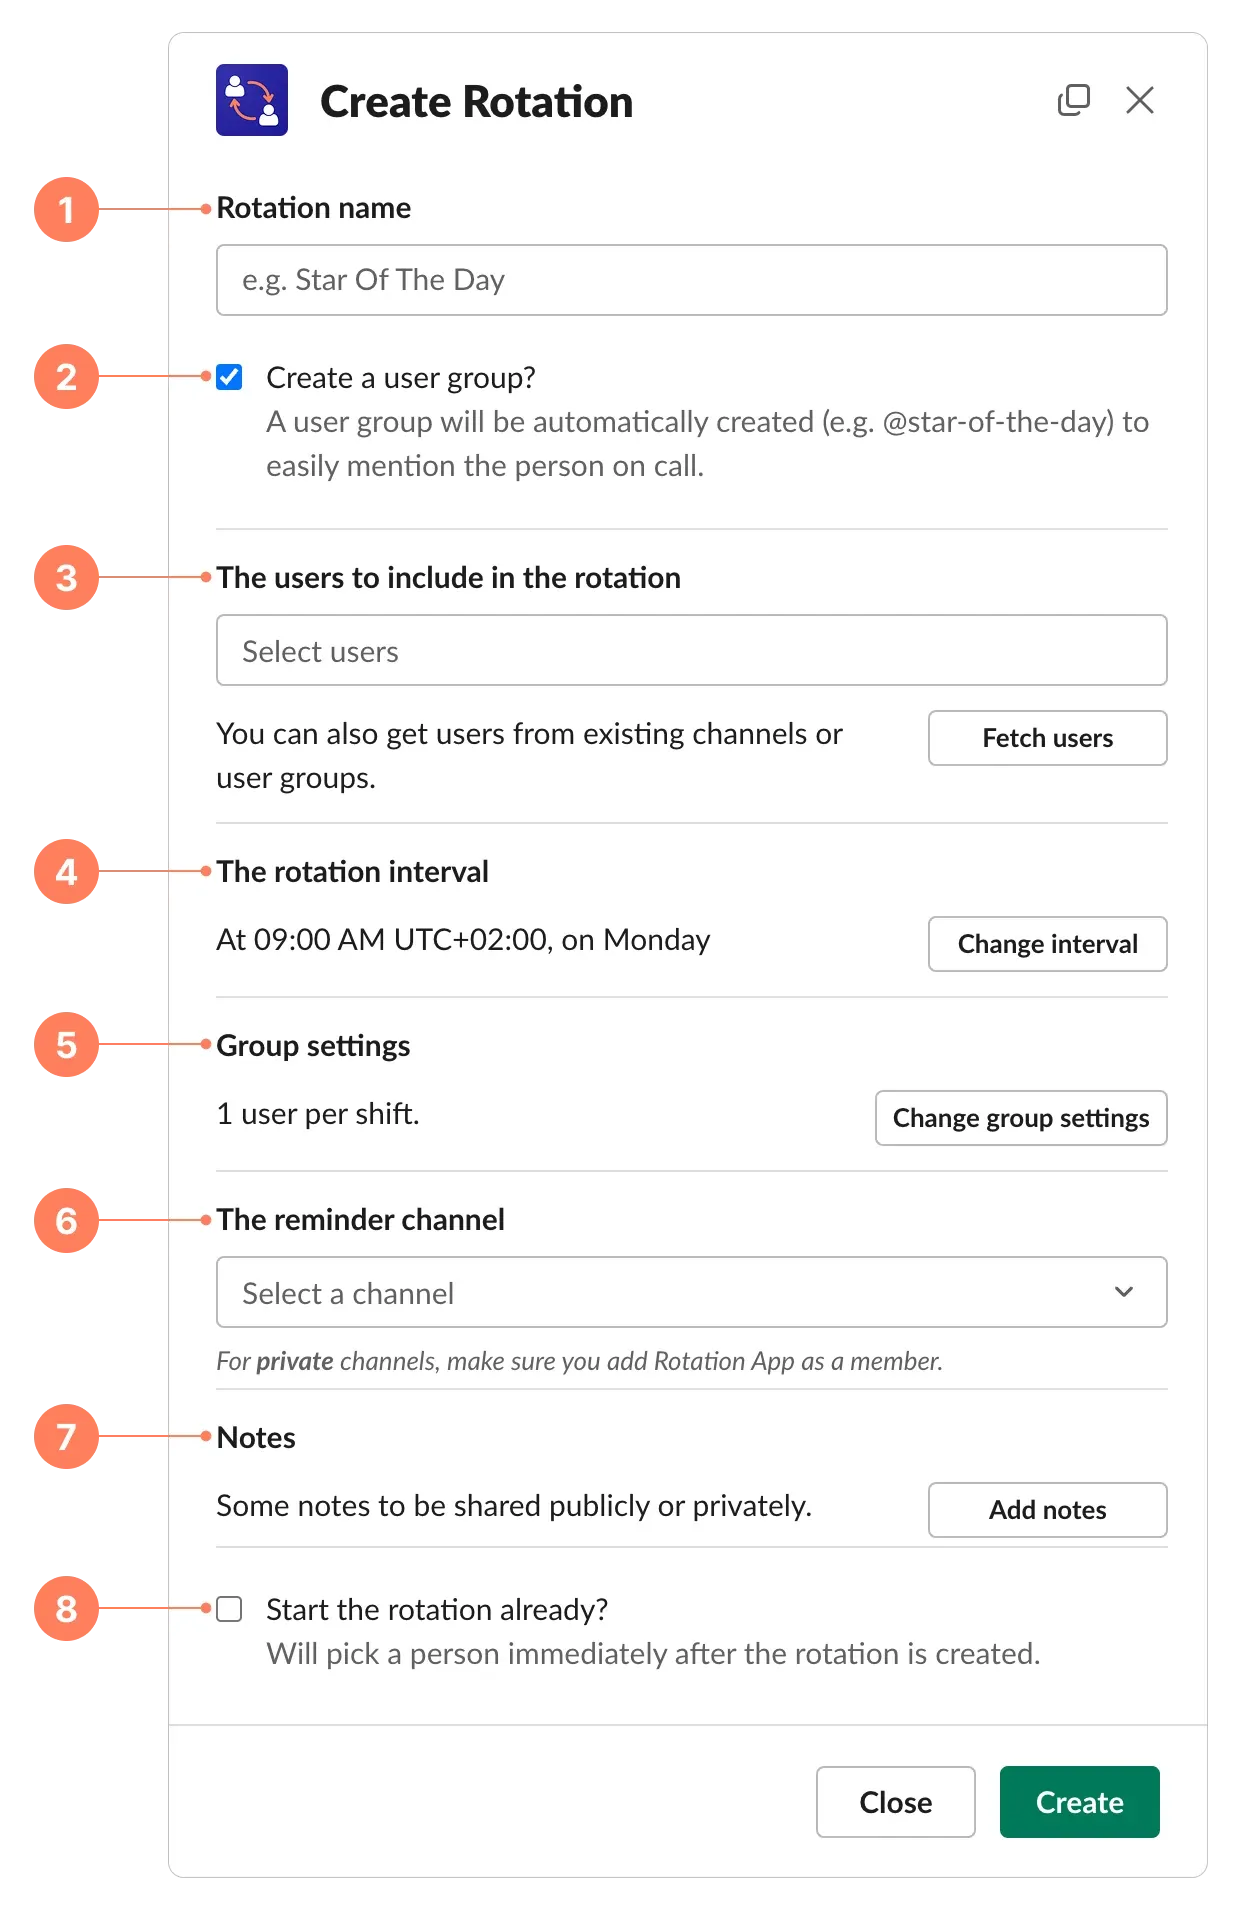
1
Give your rotation a name. The same name will be used in the optional user group. We recommend picking a name that you’ll use to refer to the person(s) on call.
👍 Good: “Star Of The Day”, “On-call Firefighter”, “Deployment Engineers”.
👎 Not as good: “Support Rotation”, “Sales Team: Rota 1”.2
Selecting the Create user group? option will create a Slack user group for your rotation, so your team can easily @mention the on-call person(s) in any workspace channel. This is highly recommended.
3
Select the users to include in the rotation.
If you’re creating a rotation for a team with an existing dedicated user group or channel, Rotation App can automatically fetch the users from there and keep the rotation users in sync.4
Set the interval (schedule) of your rotation.
Press Change interval to set the schedule of your rotation. Rotation App scheduling system is very flexible.5
By default, a rotation has one user per shift, but you can change this in the group settings. Rotation App allows creating a single user rotation or a group rotation. You can also create a “staggered rotation”, where the group changes only partially every shift.
6
Select the channel where you want Rotation App to post updates about the rotation, such as when the on-call users change.
7
You can optionally add some notes that will be shared with your team, either publicly in the reminder channel, or privately with a direct message.
8
By default, the first shift of your rotation will start on the following cycle. But if you want the shift to start in the ongoing cycle, you can select the Start the rotation already? option.
For example, if you create a daily rotation, Rotation App will only start the shift in the following week, but if you select the “Start the rotation already?” option, Rotation App will immediately select a user for the current day.
- Press “Create”
Your rotation will be created, and you should be able to find it listed in the Home tab.
Now that you have learned how to create a rotation, it’s time to learn how to edit a rotation and to manage its queue: